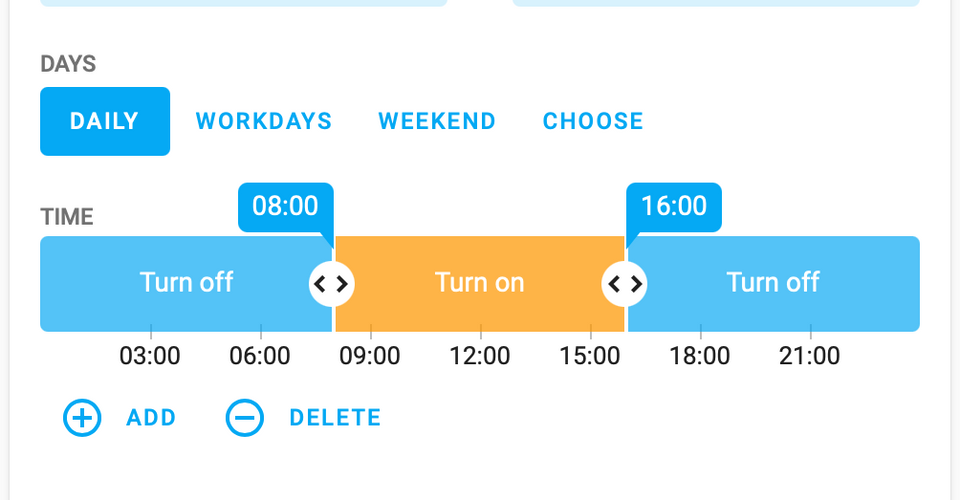
Ever wanted to set up something like dynamic notification groups in Home Assistant? Perhaps your partner wants notifications only between 1700 and 2300 while you want to get them around the clock? And if you have kids with smart phones, perhaps there are some notifications they should see between 1400 and 2000, or just in the weekends?
I will show you how you can combine a script with some helper entities and the Scheduler component to bring it to life.
We will:
- Create a Home Assistant script to send notifications
- Add a Home Assistant Toggle per family member to pause notifications
- Use conditions in the script to decide who gets a notification
- Set up Scheduler Component to enable notifications for a house member only at certain times
Pause toggles per family member
First we need to add 1 toggle for each house member / device. We can use the toggle manually in the user interface to pause notifications, or as we will show later, through a schedule.
Head over to Configuration → Helpers → Click Add Helper. Choose Toggle and give it a name like Raymond notifications and an icon like mdi:bell
Create one of these for each house member or device. Take note of their entity ids, they will be something like input_boolean.raymond_notifications
A notifier script
In order to have a reusable notify service we will make a script that contains all the logic.
Since we want to be able to pause notifications per house member we need a script with 1 branch of logic for each member. This will use somewhat advanced script features in Home Assistant. We will be using the choose action to create these branches.
notifier.yaml
notify_everyone_safely:
  alias: Notify household safely
  # We need to run the script in parallel because multiple
  # notifications can come at the same time
  mode: parallel
  # The script should take title and message as inputs
  fields:
    message:
      description: "Message content"
      example: "Washing machine done"
    title:
      description: "Message title"
      example: "Washing machine done"
  sequence:
    # Create one choose action for each house member / device
    - choose:
        # Here we check if the house member should receive a
        # notification at this time
        - conditions:
            - condition: state
              # Replace with the entity id you got in the previous step
              entity_id: input_boolean.raymond_notifications
              state: "on"
          sequence:
            # Call the notify service of your choice.
            # I use the mobile app notification type
            - service: notify.mobile_app_raymond_s_iphone
              data:
                title: "{{ title }}"
                message: "{{ message }}"
            - service: notify.mobile_app_raymond_macbook
              data:
                title: "{{ title }}"
                message: "{{ message }}"
    # Repeat choose sections for every house member
    - choose:
        - conditions:
            - condition: state
              entity_id: input_boolean.jane_doe_notifications
              state: "on"
          sequence:
            - service: notify.mobile_app_jane_doe_s_iphone
              data:
                title: "{{ title }}"
                message: "{{ message }}"
The syntax for the choose actions can seem a bit wild, but if you base your setup on this you don't need to think too much about it.
Replace notify actions with the script in automations
Now you need to replace all your instances of notify actions in automations that should notify the family with a service call to the script.
Here is an example automation, my probably most acted upon automation 😅
As you can see the service call to the script looks very similar to a regular notify action.
washing-machine-done.yaml
alias: Washing machine done
id: washing-machine-done
trigger:
  - platform: state
    entity_id: miele.washing_machine
    from: 'In use'
    to: 'Finished'
action:
  - service: script.notify_everyone_safely
    data:
      title: Wash downstairs
      message: Washing machine is finished
Congratulations 🎉 You aleady have a notification systems that allows you to disable notifications for a house member through the user interface.
Go further with scheduler component
In order to have schedules for when notifications are on/off for a house member we can turn to the Scheduler component by Niels Faber.

Follow the install instructions to set up the scheduler component + card using HACS. Then you need to make sure you have a Lovelace card configuration like this to enable editing these schedules:
scheduler-card.yaml
type: custom:scheduler-card
domains:
  - input_boolean
groups:
  - name: "Helpers"
    icon: 'mdi:toggle-switch'
    include:
      - input_boolean
With this in place you can now set up as many schedules as you like. And you can still override the current value using the user interface if you need to.
