For our halloween party we went all out on decorating the flat. Why host a halloween party if you dont go the mile, eh? We of course had a jack-o-lantern, we cut a ton of small black bats that fly across our walls, and there were blood trails on the floors, and hand imprints in blood on the bathroom. The highlight for me however was creating an interactive Stranger Things lightning installation.
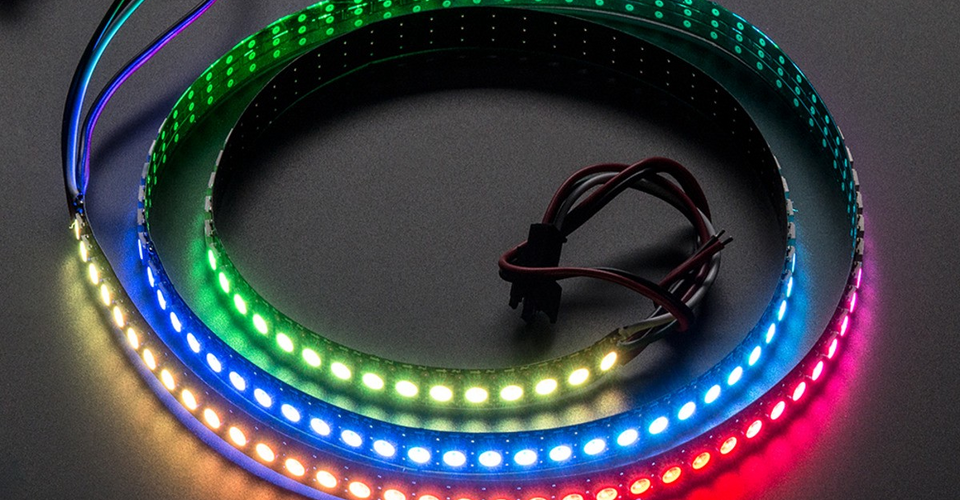
My initial plan was to use just components I had lying around from years back; Specifically a handful of Particle Core devices. The neat thing about the cores is that they are basically arduinos with onboard wifi, meaning it’s relatively easy to use the vault of resources and libraries that exist for arduino, while also making your component usable without cables for communication. Controlling individual leds are done with ease using these tiny computers; You simply plug a LED and a resistor to one of the 8 digital outputs and to ground, and then you can set HIGH/LOW to that port to flip the light on and off. But while I could get 8 LEDs this way with ease, I needed some new tricks to get up to the 29 LEDs I wanted. While there are techniques, like charlieplexing, and approaches, like using 4 particle cores, that would have worked, I found a local shop that sold 1 meter Neopixel strips containing 60 addressable LEDs.
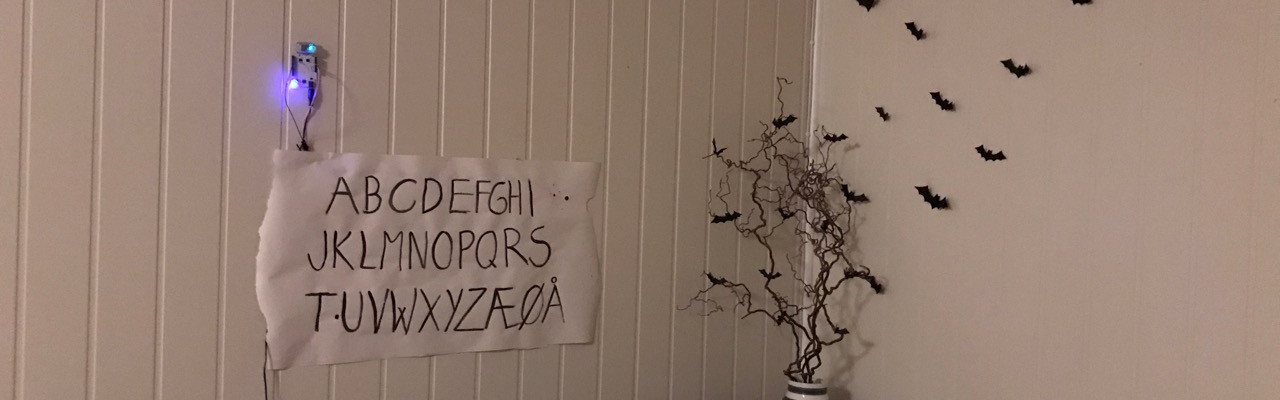
Before building the LED strip I got help in painting the letters on a big piece of paper from a paper roll. With the letters in place we would be able to measure and plan the wire lengths needed.

With the letters in place the next step was some hours of grunt work soldering everything together.
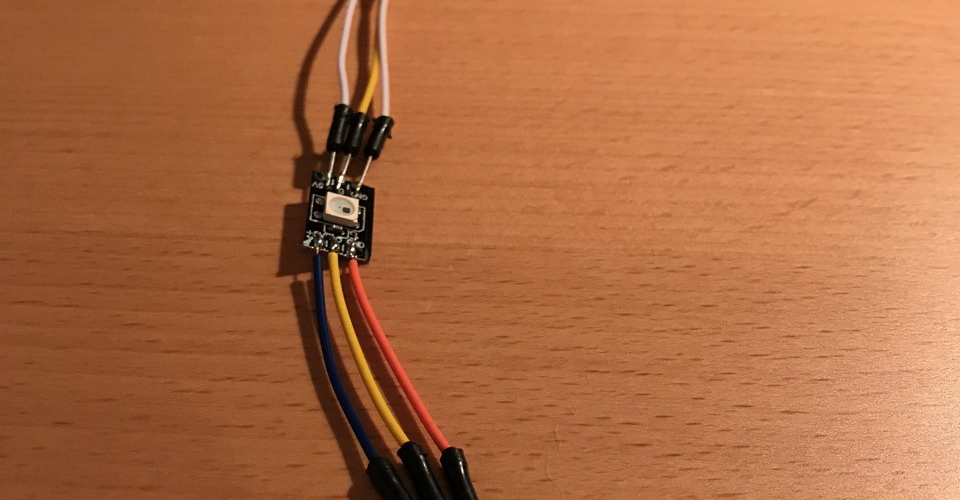
Neopixels only require 3 connections: 1 digital out, 5V power and ground. The strip works out of the box, but you can also cut it up into 60 individual LEDs just using scissors, and then re-solder all the LEDs with wires of your desired lengths. I cut of 29 LEDs and measured the distance between each letter and started soldering! Soldering short wires is a bit tedious work, and you probably need a pair of tweezers to get the work done. Clearly the neopixels are far easier to use if you don’t require readjusting the distance. I just had prototyping wires lying around, so I cut a bunch of them to suiting lengths and started soldering the 168 joints.
With the hardware seemingly under control I started looking into the code. I spend day in and out in JavaScript land, so I really wanted to do this using the excellent johnny-five library. While there is a really good option for controlling neopixels with an arduino using the node-pixel library, it did not support the particle core, or alternatively I would have had to use a secondary controller device running a custom firmware. In the end I accepted reality and decided on plain c/c++ with the NeoPixel library port.
Using the library is quite simple:
#include "neopixel.h"
#define PIXEL_COUNT 29
#define PIXEL_PIN D2
#define PIXEL_TYPE WS2812B
Adafruit_NeoPixel strip = Adafruit_NeoPixel(PIXEL_COUNT, PIXEL_PIN, PIXEL_TYPE);
void setup() {
strip.begin();
strip.show();
}
void loop() {
int ledNumber = 0;
int red = 255;
int green = 0;
int blue = 0;
int brightness = 0;
strip.setPixelColor(0, strip.Color(red, green, blue, brightness));
strip.show();
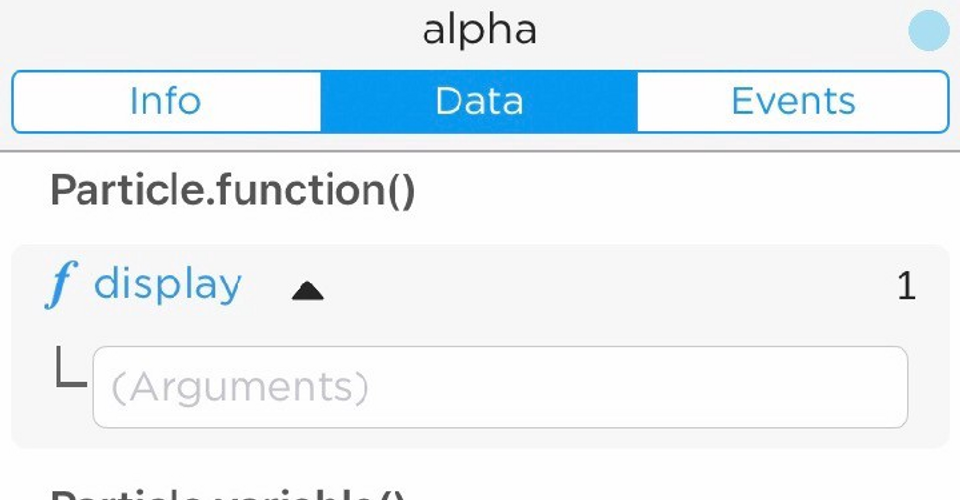
}You first call setPixelColor for each specific LED, and when you have set all the LEDs to the colour you want you call strip.show(). One of the big selling points of the Particle devices are that they are cloud connected by default, and its really easy to register a function call that will be exposed through an API for remote control. We can set up a function to light up a specific LED quite easily:
#include "neopixel.h"

#define PIXEL_COUNT 29
#define PIXEL_PIN D2
#define PIXEL_TYPE WS2812B

Adafruit_NeoPixel strip = Adafruit_NeoPixel(PIXEL_COUNT, PIXEL_PIN, PIXEL_TYPE);

int pos = -1;

int lightUp(String strPos) {
  pos = strPos.toInt();
  return pos;
}

void setup() {
  Particle.function("lightUp", lightUp);
  strip.begin();
  strip.show();
}
void loop() {
  for (int i=0; i<strip.numPixels(); i++) {
    if (i == pos) {
      strip.setPixelColor(i, strip.Color(255, 0, 0, 255));
    } else {
      strip.setPixelColor(i, strip.Color(0, 0, 0, 0));
    }
  }
  strip.show();
  delay(1000);
I placed the LED strip under the paper alphabet in order to test a single LED to make sure it would look alright. The result was pleasing. Since this would be used for a party, the room would be quite dark, so the lights would really be visible.

With everything apparently working it was just a matter of mounting everything and writing the actual code for the project. The approach was rather straight forward: Register a cloud function in the particle cloud that would take in a word, or sentence. Loop over each character in the word, find the corresponding LED position in the strip, and add that number to a list while adding a space character before and after the input. Then in the loop function I would pop the first item from the list of leds to be lit, and loop over all the LEDs in the strip and either set it to off, or if it matched the id to be lit call on a function that generated a random RGB colour. You can get the full source code on my Github.
Using particle you get a simple — yet great— mobile application for controlling the cloud functions, and for accessing some general information about your core. In the end I didn’t have time to build the web app I planned for controlling the lights, but using the iOS app we could pass the phone around in order to type with the lights.
Here it is, on the wall, working great. It was a fun project and now I’m thinking about what other things I should do with the particle cores now that I’ve dusted them and peaked my interest.